Start your project
You must use ours design template to create your design.
CorelDRAW 9 does not support our templates. We recommend using version X3 and later.
After downloading them, open CorelDRAW the template you prefer, as you would with a normal file. Then start drawing your project.
You can design for laser cutting in one of five different material formats:
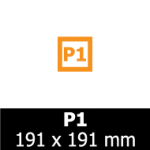
P1
useful size:
181 x 181 mm
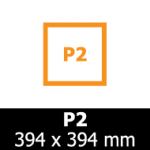
P2
useful size:
384 x 384 mm
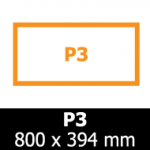
P3
useful size:
790 x 384 mm
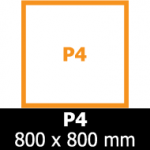
P4
useful size:
790 x 790 mm
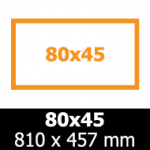
80×45
useful size:
800 x 450 mm
available only for
felt and cardboard
How to draw for the laser
The color used for the drawn lines determines what the laser will do, whether it is a cut or an engraving.
For example, if you draw a bird with a blue outline, the laser will cut a bird ...

If you convert the same lines in red, the laser will engrave the bird on the chosen material, and so on.
It's that easy!
Now let's get to the details ...
Cutting lines
The basic part of your design are the shapes you will cut.
The simplest way to visualize how this will turn into your project is to imagine placing on a sheet of paper the pieces you would like to make, and then draw their outline on the sheet with a pencil. Your file should remember that sheet with the lines drawn.
To obtain a cutting line, draw a line or shape.
So, in the window Object properties (Object properties) set the thickness of the contour by clicking in the 'Thickness' box (Width) and writing '0.01mm', then press enter:

Sets the color of the outline as blue RGB with values 0, 0, 255:

Engraving of vector lines
The vector etching process is very similar to the cutting method, but instead of piercing the material, the laser only affects the surface.
The laser will move along the engraving lines in your drawing. There are three different levels of engraving available: light, medium and deep, each with a different intensity and therefore depth. All three incisions are drawn very precisely with subtle lines, roughly the same size as the laser beam.
Thickness of the contour
In the window Object Properties (Object Properties) set the thickness of the contour by clicking in the 'Thickness' box (Width) and writing '0.01mm', then press enter.

Light vector engraving
Sets the outline color as magenta RGB with values 255, 0, 255:

Vector media engraving
Sets the outline color as RGB green with values 0, 255, 0:

Deep vector engraving
Sets the outline color as RGB red with values 255, 0, 0:

Engraving of raster fills
Generally, raster fills are used for areas with backgrounds, but you can also make a raster incision of lines that have a contour with a thickness greater than 0.3mm. Engraving in raster mode a thinner line will probably not lead to good results.
The scale of the raster engraving goes from the black that corresponds to the most marked incision, up to the very light gray that will make the engraving lighter (or white, which corresponds to the null incision). You can use any grayscale between the two extremes, but remember that the three RGB values must be equivalent. Make sure you use solid and spot colors and no patterns or textures.
To obtain a more defined border in an area engraved with a raster pattern, combines the black or gray fill with a contour corresponding to a vector engraving.
The values of the engraving depth are indicated in the "technical details" tab of each material in the catalog.
The incisions do not change according to the thickness of the material (unless otherwise indicated in the sheet).
Engraving of light raster fills
Sets the fill color to light gray with the RGB values of 230, 230, 230:

The light raster engraving is absolutely superficial, altering the color of the material without going deep.
Engraving of medium raster fills
Sets the fill color as gray with the RGB values of 128, 128, 128:

Engraving of deep raster fills
Sets the fill color as black with the RGB values of 0, 0, 0:

To use the text
All the texts inserted in your drawing must be converted into curves. In this way the laser will follow your drawing correctly, even without having the same installed font.
To turn the text into curves, just select it and then choose Arrange (Arrange)> Convert to Curves (Convert to Curves) from the top menu. Once you run this command, you will not be able to edit the text, so do this after checking the spelling!

You can create texts using fills for raster engravings, lines for vector engravings, or a combination of the two types of incisions.
To use images
Our making system takes into account only the drawings in vector, ignore all the images inserted in other formats (like.jpg or .bmp).
If you want to insert a non-vector image in your file, you have to trace it in vector. No need to do it by hand! You can do this simply by selecting the inserted image and using the command Bitmaps> Bitmap Trace (Bitmap Trace). You'll see a lot of tracing options, so do several tests until you find the one that's right for you. Make sure your traced shapes are presented in a uniform, flat color.

The original image remains behind the tracing, so select it and delete it.
Then, select the elements drawn with the 'Pick tool' and use the command and use the Arrange (Arrange)> Separate (Ungroup).

If the tracing worked properly, by clicking on the 'Modeling' tool, you should be able to see the vectors all around the individual parts of the traced image.
Finally, to choose the desired raster input level, select all the traced elements and set the fill color through the window Object Properties (Object Properties).
How to remove double lines
If you place two objects next to each other, in such a way as to match the ends, it is very likely that you get the overlap of the cutting lines.
Double lines are not easy to spot at a glance in CorelDRAW because they look identical to single lines. These double lines must be eliminated in such a way as to obtain a single cutting line, or, better said, a shared cutting line; otherwise the laser will literally cut the same part twice (which is not ideal either for the performance on the material, or for your estimate!).
This is the procedure to remove the double lines:
Step 1: Select one of the two adjacent objects with the 'Pointer' tool, and use the command Arrange> Convert to Curves (Convert to Curves).

Step 2: Use the 'Modeling' tool to select a node (one end) of the double line you would like to remove.

Step 3: With the node highlighted in blue, click on the 'Break Curve' button.

Step 4: Click on the node at the other end of the double line, and use the 'Split Curve' button again.

Step 5: Use the command Arrange (Arrange)> Divide curve (Break Curve Apart) .

Step 6: Click elsewhere to deselect the object, then click on the double line you wish to remove. At this point you will see only the line selected, and you can finally delete it by pressing delete (backspace) on the keyboard. The other blue line in the background will remain in place.

Step 7: Repeat this process until you have deleted all the double lines.
Export the file
For Coreldraw X3, X4, X5:
Step 1: Use the command File> Export.
Step 2: Change the file name, select 'Files of type: (Save as type :) SVG - Scaleable Vector Graphics', and click on 'Export'.

Step 3: Make sure that the 'Export SVG' panel is similar to the one shown in the figure (height and width will depend on the size of the template you used), then click 'OK'.

For Coreldraw X6 and later:
Step 1: Use the command File> Export
Step 2: Change the file name, select 'File type: (Save as type :) EPS - Encapsulated Postscript ', and click on' Export '.

Step 3: Make sure the colors are set as in the options window RGB (Output colors as: RGB)

Done! Now you can upload the file
or read the FAQ
